In this workshop, participants will learn, either individually or in groups, how to create and open their own blog using the WordPress publishing tool.
General Objective
Preparation time for facilitator
Competence area
Time needed to complete activity (for learner)
Name of author
Support material needed for training
Resource originally created in
Introduction
This activity sheet will outline how to use WordPress in order to learn to create a blog, and how to transmit this knowledge to participants.
Facilitation tips: Rather than simply introducing WordPress, it would perhaps be more interesting to envision an overarching project in which participants will have to ultimately create a blog. This will bring added value to the activity.
Opening Discussion
Explain to participants that they will learn to create a blog on WordPress. This will be part of the learning process. Alone or in pairs, they will create a blog before doing a writing exercise which will become their first post! Ask if anyone amongst the participants has a blog already. If someone does, ask about the topic of the blog and what platform they have used. That will allow you to learn where they are in relation to the subject matter. Explain the idea of a blog: ‘blog’ is a contraction of ‘web’ and ‘log’. Log of course, being in the sense of personal journal. Simply put, it’s an online journal. Blogs are run by people that either publish general stories from their lives or dedicate their content to a particular subject. Explain the principal advantages of a blog: Participants will work in a number of areas: editing, using social media, writing technique in regards the type of content they are sharing and search engine optimisation (incorporating a variety of methods for developing visibility). This can be an advantage on a CV. According to the content of the blog, it can highlight skills – even an expertise – or simply a passion. A blog’s content belongs to the creator. This is not the case for content shared on social media. Indeed, the general conditions of using various major social media platforms stipulate that these platforms and their partners will have the right to edit or delete and use freely and globally any text or image published by users. This also means that on social media, any content published by a user can be shared, but not used outside that platform, except by asking the author and the social media concerned. What then is WordPress? WordPress is a blogging platform allowing users to add, edit and delete all types of content you might see on a site: images, texts, navigation menus contact forms etc. All of this can be done easily without any knowledge of programming, simply by following the intuitive interface.
Creating a Blog
Depending on how many computers are available, ask participants to sit alone or in pairs. The facilitator must show how to create a WordPress account. It is on their own accounts that participants will then post their blog. Discuss for 5 minutes – before creating the account, ask participants what they would like their blog to be about. They will now have to propose their ideas for the exercise. Show the following steps to follow.
Step 1: go to https://wordpress.com/ to create an account. Fill in your email address, username and password. Participants must provide a valid email address, as they will have to refer to their inbox: WordPress will send them a mail for the validation of their account. 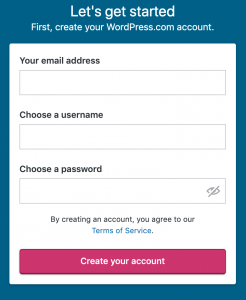
Step 2: Create the blog title and decide on the themes and objective. 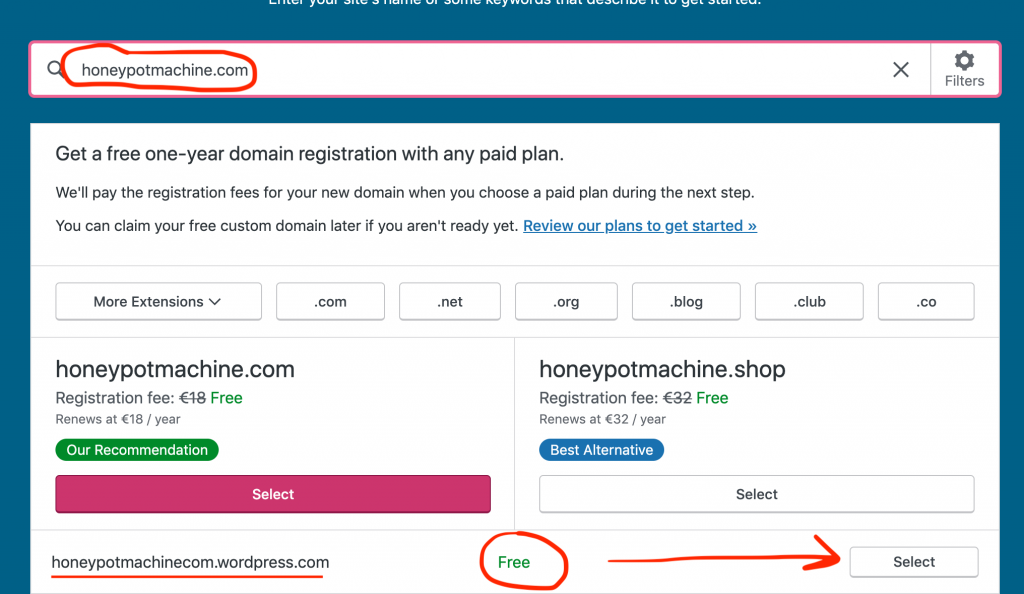
Step 3 : Choose the free plan 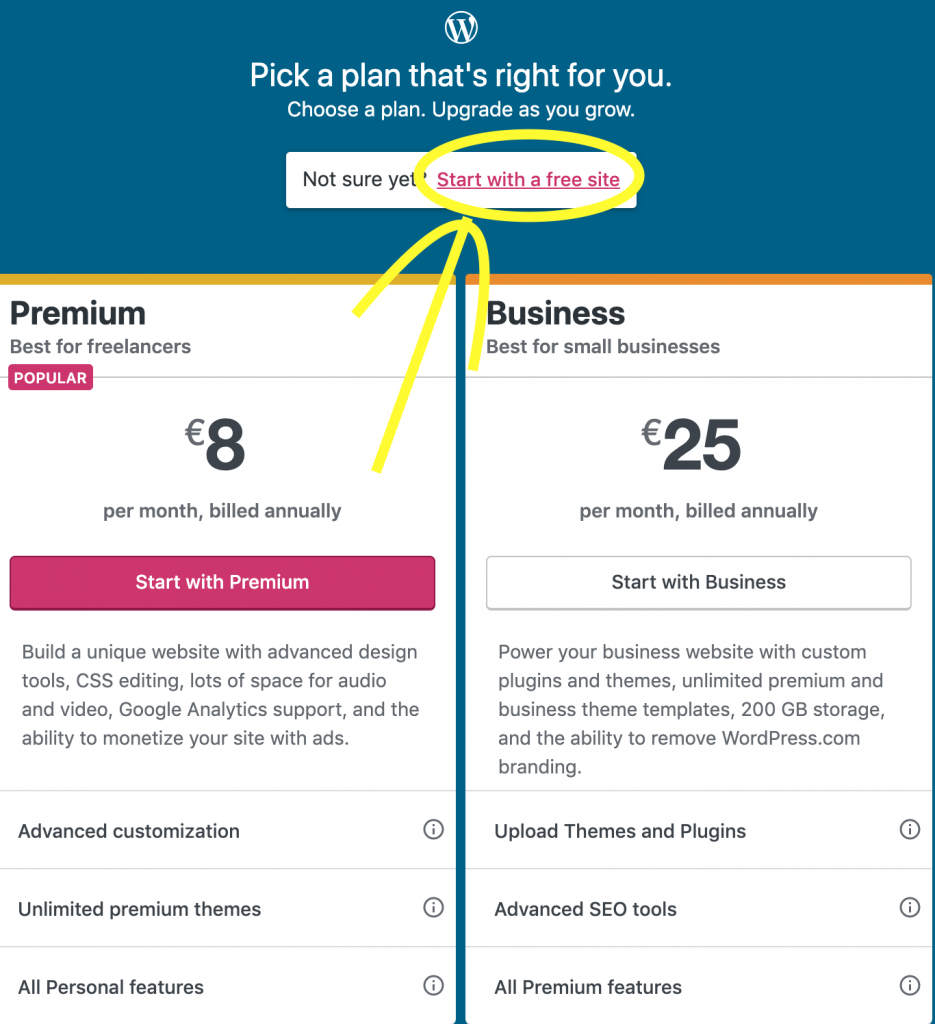
Getting to know WordPress
Once the blog has been created, you will arrive at your dashboard: 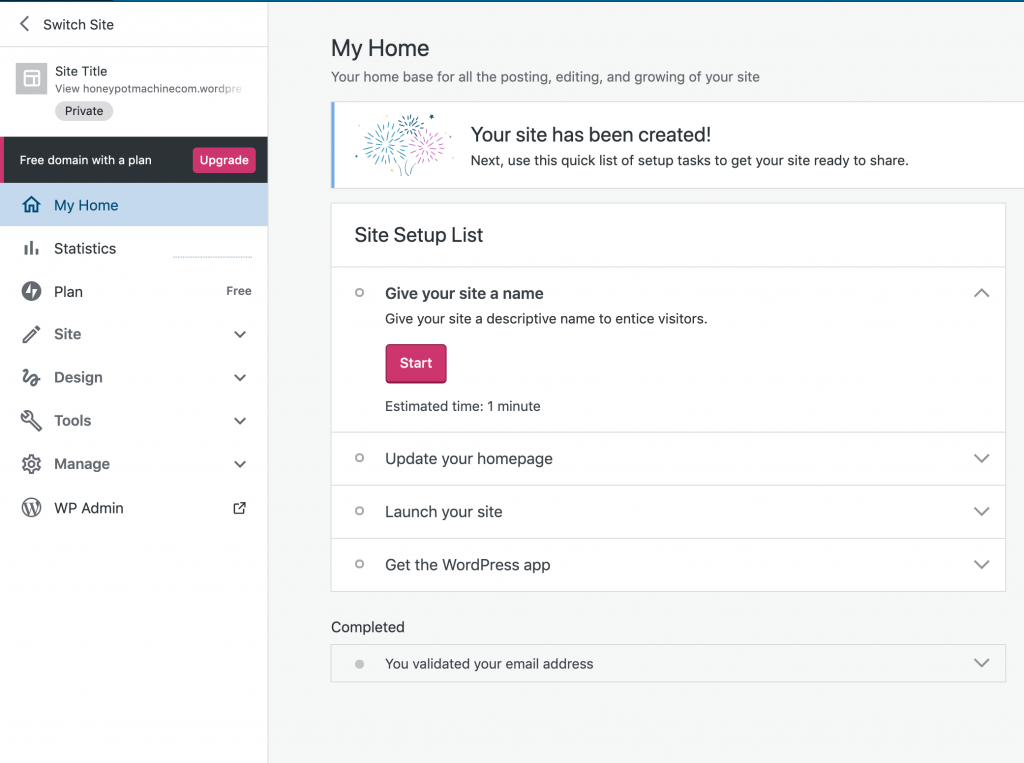 If there is enough time, suggest filling in the empty fields. If not, ask simply that participants verify their email address. A mail from WordPress with have been sent to the email address they provided. Explore the platform with them then:
- Choose a logo (see: left-side column; click on Design -> Customise -> Site Identity -> Create a Logo)
- Point out the number of visitors (left-side column; statistics)
- Change the background colour – the theme – of the blog: make it so that the authors’ names display themselves on the blog at the bottom of the page. See: left-hand column; Design -> Customise -> Footer -> Add a widget -> Authors -> Done. On the site, the category ‘authors’ will be displayed on the bottom of the page and the name of the participant will appear.
- Follow their colleagues’ blogs. For this, the ‘Reader’ mode must be selected in the top bar beside ‘My Site’.
Writing
Propose a writing exercise. Each participant will post content of their choosing on their blog. The post should be written in one of the following forms:
- Journalistic portrait: participants will form pairs, if they have not done so already, and based on the answers to questions they ask, will write a piece.
- 20 questions portrait: again, in pairs, and assuming the participants do not already know each other well, they should play 20 Questions, having the questions be based on themselves. Each participant can then decide to publish either the portrait suggested by their partner through the game, or their own.
- Proustian portrait: Marcel Proust, 20th Century French writer had a habit of making his friends complete a questionnaire in order to get to know them better. The facilitator will present this same questionnaire and based on the answers (not to worry if there are some missing!), the participant will write a small piece about themselves. They can in addition suggest more modern elements such as cultural tastes. You can refer to Proust’s questionnaire here.
Post a blog entry
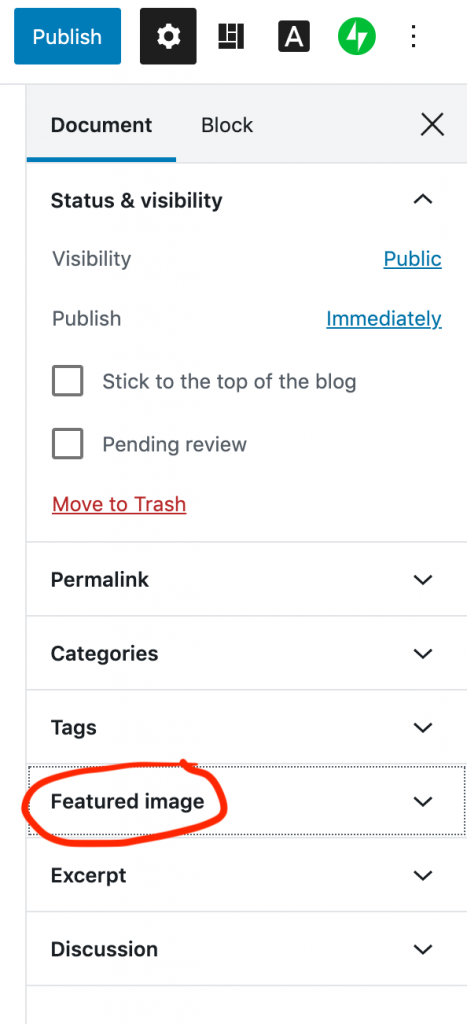
Now it’s time to publish. Ask participants to click on the left-side column; then Posts -> Add a new post. They will now arrive at the interface to create a blog entry. This resembles a basic word processor. 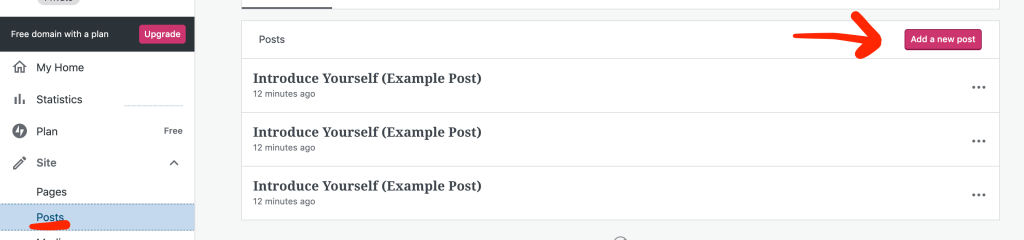 Participants should now copy-paste the text they had written on their computer – or to type if they had written it by hand. They could also have, from the beginning, typed it directly into the WordPress interface – that’s what it was designed for! Ask the group to arrange the text in the way they wish, then to add a featured image and plan the publication.
- For the photo: right-side column; featured image -> set featured image
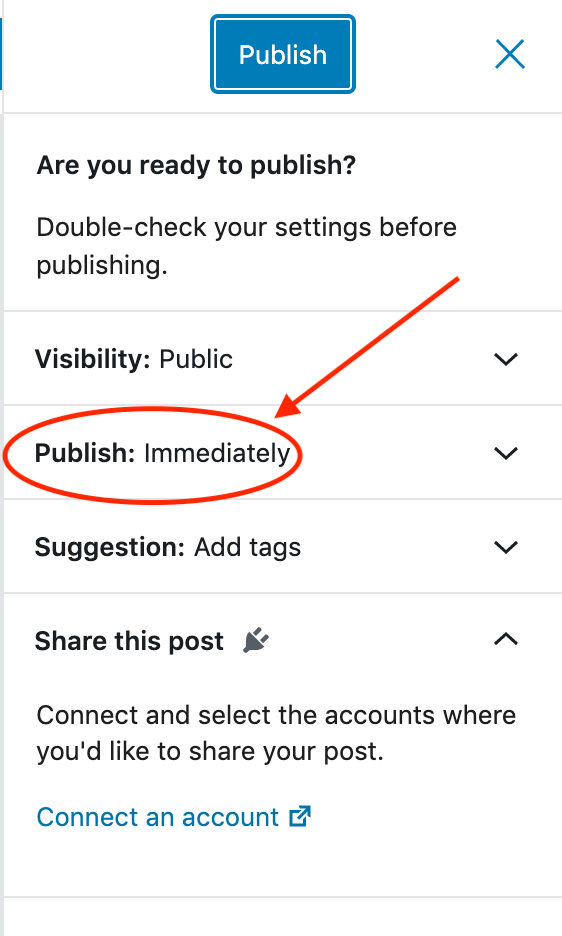
- For publication: top bar; Publish -> Publish: immediately -> choose date/hour. Plan the publication for two minutes later.