To program this game, we will use the Scratch platform which has the advantage of using visual code: no need to learn a programming language to build your own games and videos!
General Objective
Preparation time for facilitator
Competence area
Time needed to complete activity (for learner)
Name of author
Resource originally created in
Creating the playing field
We will first create the playing field. From the home page, click ‘Start Creating‘. In the bottom right corner of the next screen, click the ‘Backdrop‘ tab. Now draw your backdrop by using the Rectangle tool. Trace large coloured rectangles. 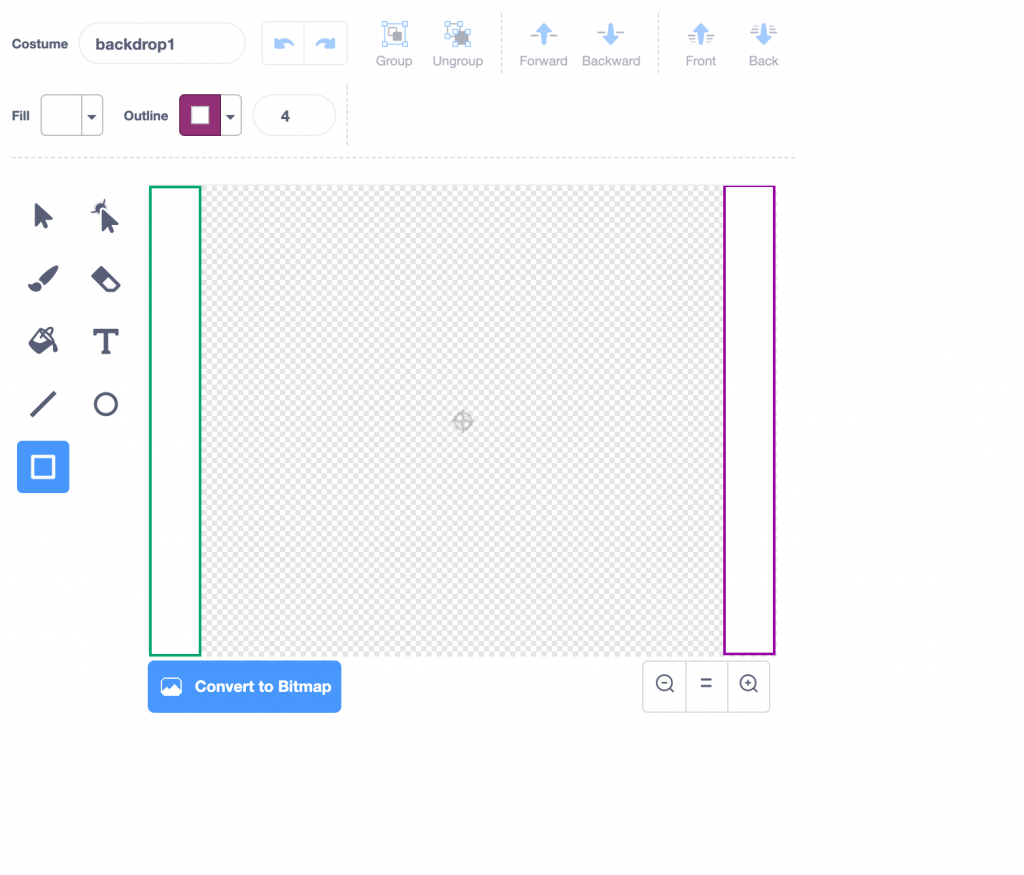
Adding the players and puck
Now choose three new sprites – two players and one Puck – by clicking on the sprite icon towards the bottom right of the screen. You can choose sprites from the default Scratch selection, or draw them yourself. 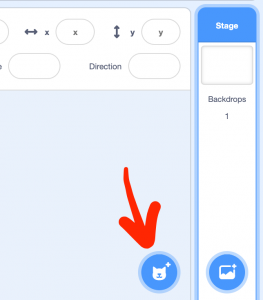
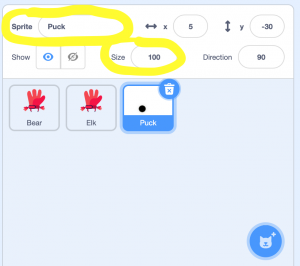
Now rename your sprites by clicking on ‘Sprite‘ field pictured below. Our first player is Elk and the second, Bear. You should also change the size of the sprites to whatever you feel fits the field appropriately. 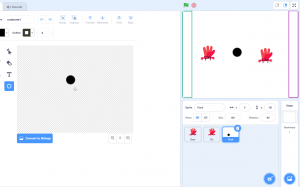 .
. 
Coding movement rules
Now we will program the players so they can move on a Y axis. Click on ‘Code‘ in the top left of the screen.
1. We will move Bear with the directional arrow keys (we won’t need to use the left and right arrows as the player can only move up and down). For this create two blocks like the ones below in the script for Bear. Note that you can drag modules from the list on the left the blank space on the right to create your own blocks. For these commands, we have taken the orange module from ‘Control’ and the blue modules from ‘Events’.
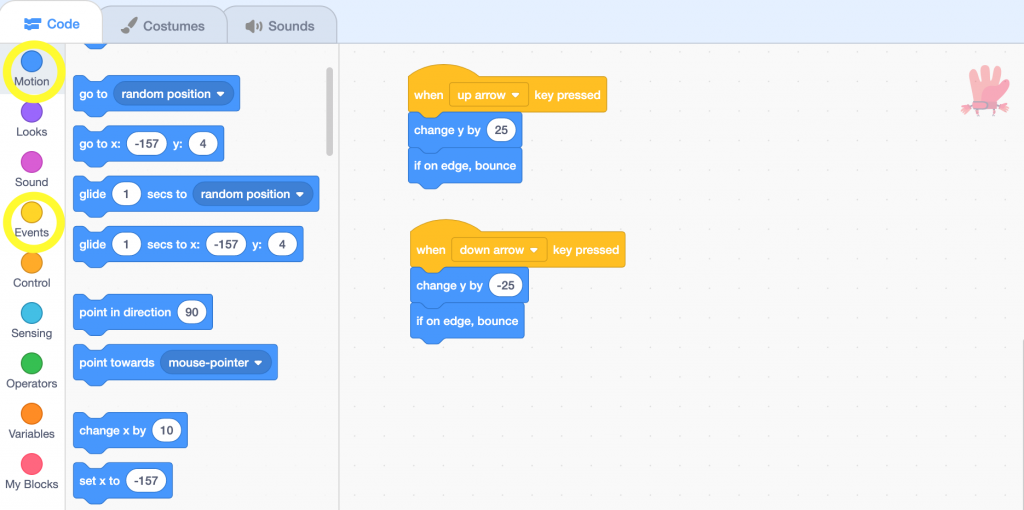 When the up arrow key is pressed, Bear moves 25 on the Y axis. When the down arrow key is pressed, Bear moves -25 on the Y axis. In either case, if they touch the edge, they stop – meaning they cannot leave the screen.
2. For Elk, the blocks are the same – just replace ‘up arrow’ and ‘down arrow’ with two other keys: for example ‘z’ for up and ‘s’ for down. See the blocks below. Write these into Elk’s script.
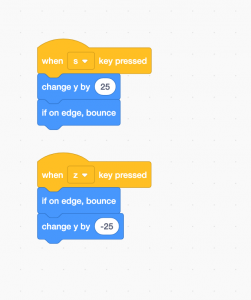
When the s key is pressed, Bear moves 25 on the Y axis. When the z is pressed, Bear moves -25 on the Y axis. In either case, if they touch the edge, they stop – meaning they cannot leave the screen. Try it now by pressing up, down, z and s: the players should move up and down.
Setting the players' default positions
1. The two players should be correctly positioned at the beginning of the game. You will therefore need to define the default positions. Create the blocks replace X and Y with the correct values. Add these blocks for both players – Bear on the left and Elk on the right. When the flag is clicked, Bear should be -165 on the X axis and 0 on the Y axis. 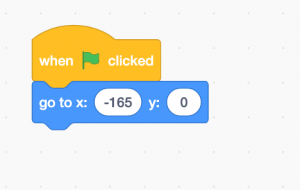
When the flag is clicked, Elk should be 160 on the X axis and 0 on the Y axis. 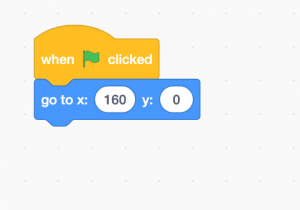
Test your code by clicking on the green flag – your players will reset themselves after every game.
Coding the start of the game
1. You will need to create two variables: Bear and Elk. These two variables will allow points to be counted. Choose ‘Variables’ from the left-hand menu on the ‘Code’ screen. Now click on ‘Make a Variable’ and keep the default selection of ‘For all Sprites’, meaning this will affect both players. Create one called ‘Bear’ and one called ‘Elk’. This script – which you don’t have to change as it is defaulted begin at 0 once you create the variable – will enable us to put the score at 0 at the beginning of the game
2. Now, to place the puck at the centre, write this script.
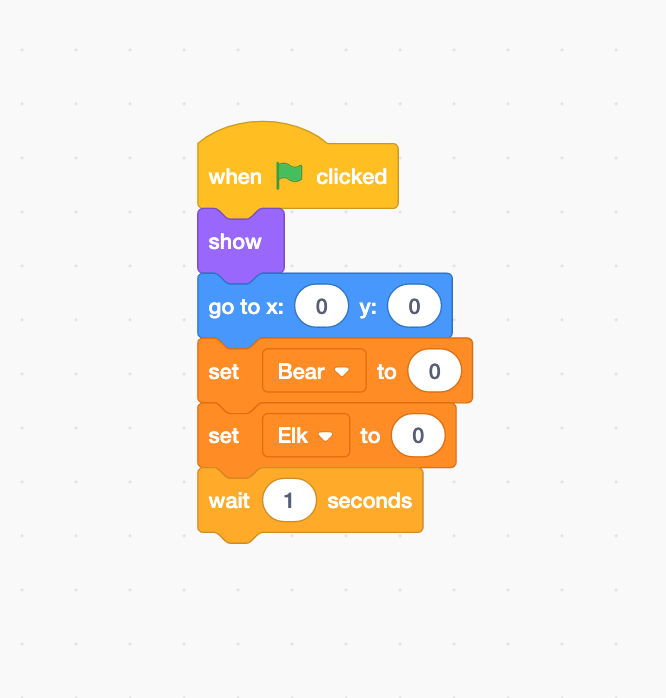 When the green flag is clicked, the puck appears and is placed on the centre of the screen. The scores of Bear and Elk are set at 0. The puck will now wait one second.
Coding the player/puck interactions
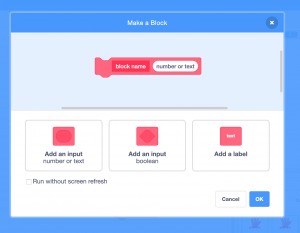
1. We will now create our own block. This is a useful function that allows us to simplify otherwise complex code, amongst other things. Here, we will use it to manage Puck/player interactions. Go to the Coding section for Puck. Go to ‘My Blocks‘, then ‘Make a Block‘. The following window will open. You don’t need to click any of the three options this time.
Name your block, here ‘touchPuck’, click on ‘ok’. This block will now appear in the script window. Now, you will need to add two conditions: 1) if Puck touches Bear and 2) if Puck touches Elk. Add the following actions to the block: 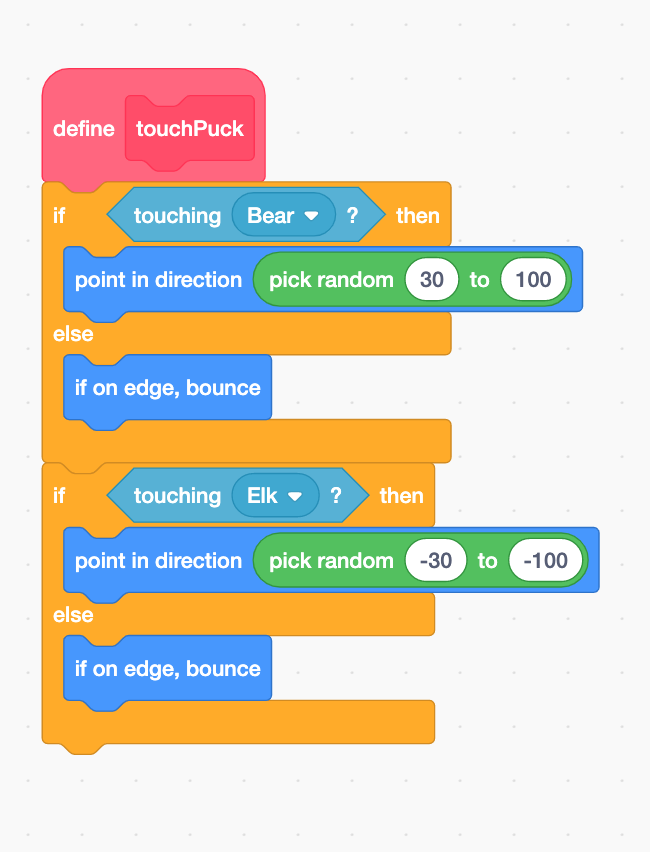 The function of touchPuck is defined by the following actions: if Puck is touched by either Bear or Elk, it will move randomly between 30 and 100 degrees and will bounce if the edge of the board is reached.
Managing game reset
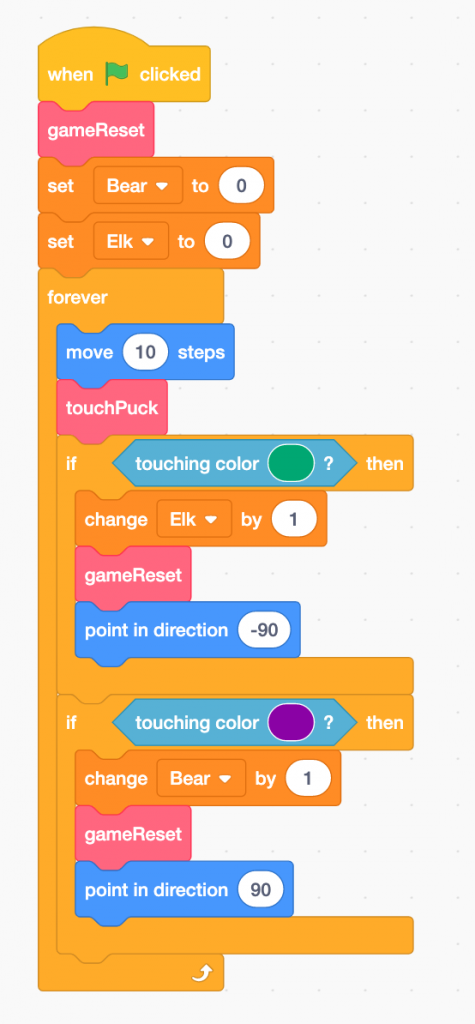
1. Next, we are need to add two more conditions in the case that Puck passes the goal line. If this happens, we will need to add 1 to the score of the scoring player and then reset Puck to the centre. For this, create one more block ‘gameReset’. This is the beauty of functions (blocks): for three situations (starting/resetting the game, Bear scores, Elk scores) we only need to write one script! Go to Puck’s script. The resetGame function is defined by the following: Puck disappears, resets to the centre (X=0; Y=) waits one second and reappears.

2. Now all that’s left is to put the last two blocks together. It’s that easy and the code will be light and simple. Don’t forget to add the module ‘Repeat indefinitely‘ as well as the module ‘Move 10 steps’ without which Puck will remain static. Make sure the colour conditions match the exact ones you used for the goal lines. Imagine how much more complex this would be without the module system! When the green flag is clicked, the resetGame function is activated. Bear and Elk’s scores are set to 0. Indefinitely, the puck repeats the following: it moves by 10 and activates the touchPuck function. If the green colour is touched, Elk’s score increases by 1, the function resetGame is activated and the puck goes back to the centre. If the colour purple is touched, Bear’s score increases by 1, resetGame is activated and the puck goes back to the centre. The game is built. Test to see it works properly!
Bonus
You have now completed your version of the classic Pong arcade game. Play around with increasing the difficulty by, for example:
- Increasing the speed of the puck
- Making the players move quicker