In this workshop, participants will learn how to make a simple juggling video game using the Scratch software
General Objective
Preparation time for facilitator
Competence area
Time needed to complete activity (for learner)
Name of author
Support material needed for training
Resource originally created in
Creating the animation and ball
- We will put in place each element required for the game
To start, write the following code in the stage script: 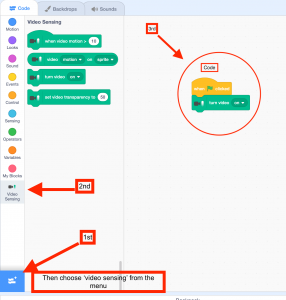
When the green flag is clicked, the computer’s camera will activate and the stage displays the capture. Try it now. Note: if it’s not working, you may need to give permission to Scratch to access your computer’s camera. If using Chrome for example you can do that by clicking on the camera icon shown below.

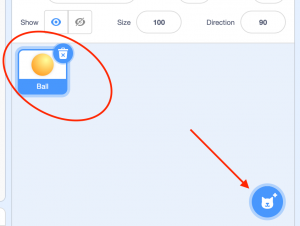
2. Next, we will need to insert a ball. Click on the sprite icon and then ‘Choose a sprite’. Then choose ‘Ball’ which can be set to have several colours.
Placing the ball
Place ball on the left of the screen. Next write the following code in the ball’s script: 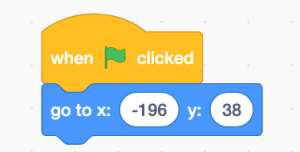
When the green flag is clicked, the ball will be placed at the left of the screen. Note: the coordinates correspond to the starting position (appearing on the camera) and can therefore be different from the screen capture.
Moving the ball
We need the ball to follow a trajectory as if we have really thrown it in the air. It therefore has to make a nice parabola when launched. To do this, copy the following code and it to the previous blocks:
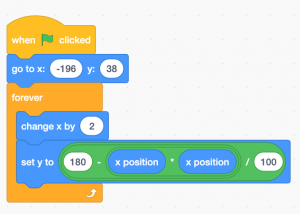
Without stopping, the ball will move up and form a parabola across the length of the stage. For more details on this block, see below – however it is not essential to understand the formula to continue. Click the green flag to test the code.
Changing the ball's direction
The ball needs to change direction when it’s clicked on. For this, create a variable and name is ‘sign’ which will control the direction of the ball. Go to ‘Variables’, select ‘Make a Variable’ and tick the ‘For this sprite only’ box. Complete the previous code with the following and everything will be ready for coordinating the video capture.
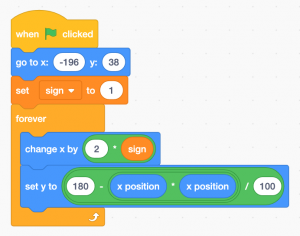
When the flag is clicked, the value of the variable ‘sign’ is set at 1. The ball is placed at the left of the stage, then advances 2*sign thus making a parabola.
Coding the interaction between user and ball
Recreate the following block which will oversee the interaction of the ball with the user: 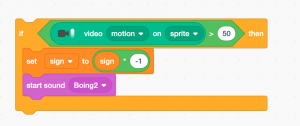
‘If the video motion on sprite > 50’ means you want the player to touch the ball with a certain intensity; the number 50 corresponds to a fairly stern motion. By changing the value of sign, you can slow down or speed up the ball. Next, connect this new block to the previous one as follows:
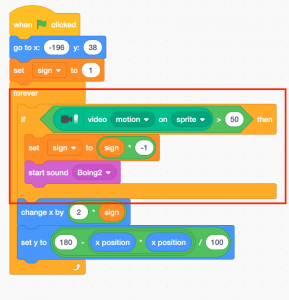
The coding’s finished. All you need to is clone the ball and, if you want, vary the clones’ colours.
Going further
To spice up the game, you can
- Create different levels of difficulties with various balls
- Add a scoring system
- Add a kind of ball that should be avoided or the player loses points
Annex: nice trajectory
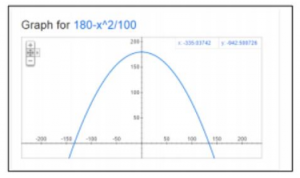
To read this explanation, we recommend you be familiar with the concept of coordinates and mathematic functions. Let’s revisit the block dealing with trajectory:

If we leave the notion of sign aside, there is quite a simple notion at play here: adding 2 to x (moves subject slightly to the right) then modifying that movement by a certain amount. 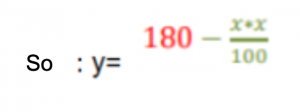
The figure denotes that whatever happens, 180 will be added to height if x = 0 (i.e. we’re at the centre) then y = 180. The second part controls the appearance of the trajectory. If we trace along a graph the coordinates of x and y, we will get what we want: a bell curve trajectory.